mNo edit summary |
No edit summary |
||
| Line 22: | Line 22: | ||
{{HeadingB|Battle Information}} |
{{HeadingB|Battle Information}} |
||
| + | <div class="mw-collapsible mw-collapsed" style="width:100%> |
||
| − | '''Blade Attacking Tips:''' |
||
| + | '''Blade Attacking Tips:'''<div class="mw-collapsible-content"> |
||
*<u>''Pierce/Short Blades:''</u> You have a choice of attacking the goddess, the horn or the tentacles as melee pierce attacks are all effective on these parts. Consistently attacking the tenctacles will eventually inflict '''Down''' on Amaterasu. Unbounding any of these parts or enraging Amaterasu will make your melee pierce attacks slightly stronger. |
*<u>''Pierce/Short Blades:''</u> You have a choice of attacking the goddess, the horn or the tentacles as melee pierce attacks are all effective on these parts. Consistently attacking the tenctacles will eventually inflict '''Down''' on Amaterasu. Unbounding any of these parts or enraging Amaterasu will make your melee pierce attacks slightly stronger. |
||
*<u>''Sunder/Long Blades:''</u> Sunder attacks are effective on the goddess, the horn and feet. Bomb/Radial Impulse Edge is also effective on the feet and consistently attacking them will eventually inflict '''Down '''on Amaterasu, making this part one of your primary targets. Unbounding the goddess and/or the horn will make your sunder attacks slightly stronger on these parts and enraging Amaterasu will make the goddess, the horn and feet weaker against sunder attacks. The feet will also become weaker against bomb/radial Impulse Edge when Amaterasu is enraged. |
*<u>''Sunder/Long Blades:''</u> Sunder attacks are effective on the goddess, the horn and feet. Bomb/Radial Impulse Edge is also effective on the feet and consistently attacking them will eventually inflict '''Down '''on Amaterasu, making this part one of your primary targets. Unbounding the goddess and/or the horn will make your sunder attacks slightly stronger on these parts and enraging Amaterasu will make the goddess, the horn and feet weaker against sunder attacks. The feet will also become weaker against bomb/radial Impulse Edge when Amaterasu is enraged. |
||
| Line 28: | Line 29: | ||
*<u>''Elemental:''</u> Amaterasu has high defense against elemental attacks except for its tentacles which are weak against the spark attribute. Enraging Amaterasu will slightly augment your spark elemental attacks on the tentacles. |
*<u>''Elemental:''</u> Amaterasu has high defense against elemental attacks except for its tentacles which are weak against the spark attribute. Enraging Amaterasu will slightly augment your spark elemental attacks on the tentacles. |
||
*Pay close attention to your distance when fighting an Amaterasu. Stay out of its melee range but don't go too far from it as it will start firing its unique laser cannon attacks on you. Attack only during the backswing animation of its attacks then back-step and return to the proper distance. |
*Pay close attention to your distance when fighting an Amaterasu. Stay out of its melee range but don't go too far from it as it will start firing its unique laser cannon attacks on you. Attack only during the backswing animation of its attacks then back-step and return to the proper distance. |
||
| + | </div></div> |
||
| − | |||
| + | <div class="mw-collapsible mw-collapsed" style="width:100%> |
||
| − | '''Gun Attacking Tips:''' |
||
| + | '''Gun Attacking Tips:'''<div class="mw-collapsible-content"> |
||
*<u>''Pierce/Assault and Sniper Gun:''</u> Amaterasu is highly resistant to gun attacks and its feet are the only part where Amaterasu takes damage on shot/laser bullet attacks. Continuously firing on Amaterasu's feet will send it into a '''Downed''' state. While enraged, Amaterasu's feet will slightly take more damage on shot/laser bullets. |
*<u>''Pierce/Assault and Sniper Gun:''</u> Amaterasu is highly resistant to gun attacks and its feet are the only part where Amaterasu takes damage on shot/laser bullet attacks. Continuously firing on Amaterasu's feet will send it into a '''Downed''' state. While enraged, Amaterasu's feet will slightly take more damage on shot/laser bullets. |
||
*<u>''Crush/Blast Gun:''</u> Amaterasu is a difficult opponent to fight when using gun attacks but its horn, spine and feet are vulnerable to bomb/radial bullets and its own Aragami bullets. Use HDH bomb bullets on the spine and IOD bomb bullets on the horn. Amaterasu's feet are easier targets for normal bomb/radial and its own Aragami bullets as compared to the first two parts, not to mention that attacking this part will eventually inflict '''Down '''on Amaterasu. The feet's defense against crush type bullets will slightly weaken while Amaterasu is enraged. |
*<u>''Crush/Blast Gun:''</u> Amaterasu is a difficult opponent to fight when using gun attacks but its horn, spine and feet are vulnerable to bomb/radial bullets and its own Aragami bullets. Use HDH bomb bullets on the spine and IOD bomb bullets on the horn. Amaterasu's feet are easier targets for normal bomb/radial and its own Aragami bullets as compared to the first two parts, not to mention that attacking this part will eventually inflict '''Down '''on Amaterasu. The feet's defense against crush type bullets will slightly weaken while Amaterasu is enraged. |
||
*<u>''Elemental:''</u> Always use spark elemental bullets when fighting against Amaterasu. Though spark elemental attacks on Amaterasu are not as effective as using physical gun attributes on selected parts. |
*<u>''Elemental:''</u> Always use spark elemental bullets when fighting against Amaterasu. Though spark elemental attacks on Amaterasu are not as effective as using physical gun attributes on selected parts. |
||
| + | </div></div> |
||
| − | |||
| + | <div class="mw-collapsible mw-collapsed" style="width:100%> |
||
| − | '''Status Resistances:''' |
||
| + | '''Status Resistances:'''<div class="mw-collapsible-content"> |
||
{| border="0" cellpadding="2" cellspacing="2" width="100%" |
{| border="0" cellpadding="2" cellspacing="2" width="100%" |
||
! width="33%"|Condition |
! width="33%"|Condition |
||
| Line 52: | Line 55: | ||
| style="text-align: center; "|Standard |
| style="text-align: center; "|Standard |
||
|} |
|} |
||
| + | </div></div> |
||
| − | |||
| + | <div class="mw-collapsible mw-collapsed" style="width:100%> |
||
| − | '''Enraged Effects:''' |
||
| + | '''Enraged Effects:'''<div class="mw-collapsible-content"> |
||
*<u>''Rage Indicator:''</u> Small flashes of light is seen around the goddess part. |
*<u>''Rage Indicator:''</u> Small flashes of light is seen around the goddess part. |
||
*Amaterasu's speed and aggressiveness will noticeably increase. |
*Amaterasu's speed and aggressiveness will noticeably increase. |
||
| Line 60: | Line 64: | ||
*Feet will have decreased defense against all gun and blade physical attributes. |
*Feet will have decreased defense against all gun and blade physical attributes. |
||
*Amaterasu will gain access to its Flare Caller attack (Summons fire balls left and right which then homes on selected God Eaters). |
*Amaterasu will gain access to its Flare Caller attack (Summons fire balls left and right which then homes on selected God Eaters). |
||
| + | </div></div> |
||
| − | |||
| + | <div class="mw-collapsible mw-collapsed" style="width:100%> |
||
| − | '''Unbounding Tips:''' |
||
| + | '''Unbounding Tips:'''<div class="mw-collapsible-content"> |
||
*<u>''Goddess:''</u> All blade attacks are effective in unbounding this part. |
*<u>''Goddess:''</u> All blade attacks are effective in unbounding this part. |
||
*<u>''Horn:''</u> Similar to the goddess, all blade attacks are effective on this part. |
*<u>''Horn:''</u> Similar to the goddess, all blade attacks are effective on this part. |
||
*<u>''Tentacle:''</u> Short Blades with high pierce attributes can unbound this part. You may have to attack this part a lot in order to unbound it. |
*<u>''Tentacle:''</u> Short Blades with high pierce attributes can unbound this part. You may have to attack this part a lot in order to unbound it. |
||
| + | </div></div> |
||
| − | |||
| + | <div class="mw-collapsible mw-collapsed" style="width:100%> |
||
| − | '''Other Useful Tips:''' |
||
| + | '''Other Useful Tips:'''<div class="mw-collapsible-content"> |
||
*<u>''Weak Points:''</u> You can inflict '''Down''' on an Amaterasu by continuously attacking the following parts: |
*<u>''Weak Points:''</u> You can inflict '''Down''' on an Amaterasu by continuously attacking the following parts: |
||
**Feet using any kind of bullet attacks including its own Aragami bullets. |
**Feet using any kind of bullet attacks including its own Aragami bullets. |
||
| Line 76: | Line 82: | ||
*You can only get hit once by its left-right-left tentacle combo. |
*You can only get hit once by its left-right-left tentacle combo. |
||
*Amaterasu have an above average and fairly wide visual senses. Its auditory senses are considered above average as compared to other Aragami. |
*Amaterasu have an above average and fairly wide visual senses. Its auditory senses are considered above average as compared to other Aragami. |
||
| + | </div></div> |
||
{{HeadingB|Additional Information}} |
{{HeadingB|Additional Information}} |
||
| Line 101: | Line 108: | ||
|} |
|} |
||
| + | {{HeadingB|Defense Attributes}} |
||
| − | {{HeadingB|Defense Attributes}}''The numbers below represent a rough estimate of the Aragami's defense (From 1-100) for the specified attributes. The higher the value, the weaker your attack will be.'' |
||
| + | <center>''The numbers below represent the percentage estimate of the Aragami's defense (From 1% to 100%) for the specified attributes. The higher the value, the weaker your attack will be.''</center> |
||
| + | <tabber> |
||
| + | Normal= |
||
| + | {| border="0" cellpadding="1" cellspacing="0" width="100%" |
||
| + | ! rowspan="2" scope="col"|Part |
||
| + | ! colspan="2" rowspan="1" scope="col" style="text-align: center; "|Gun |
||
| + | ! colspan="3" rowspan="1" scope="col" style="text-align: center; "|Blade |
||
| + | ! colspan="4" rowspan="1" scope="col" style="text-align: center; "|Elemental |
||
| + | |- |
||
| + | ! scope="col" style="text-align: center; "|Crush |
||
| + | ! scope="col" style="text-align: center; "|Pierce |
||
| + | ! scope="col" style="text-align: center; "|Sunder |
||
| + | ! scope="col" style="text-align: center; "|Crush |
||
| + | ! scope="col" style="text-align: center; "|Pierce |
||
| + | ! scope="col" style="text-align: center; "|Blaze |
||
| + | ! scope="col" style="text-align: center; "|Freeze |
||
| + | ! scope="col" style="text-align: center; "|Spark |
||
| + | ! scope="col" style="text-align: center; "|Divine |
||
| + | |- |
||
| + | | style="white-space: nowrap; text-align: center; "|Goddess (Unbound) |
||
| + | | style="text-align: center; "|80 |
||
| + | | style="text-align: center; "|90 |
||
| + | | style="text-align: center; "|20 |
||
| + | | style="text-align: center; "|20 |
||
| + | | style="text-align: center; "|30 |
||
| + | | style="text-align: center; "|90 |
||
| + | | style="text-align: center; "|90 |
||
| + | | style="text-align: center; "|80 |
||
| + | | style="text-align: center; "|90 |
||
| + | |- |
||
| + | | style="white-space: nowrap; text-align: center; "|Horn (Unbound) |
||
| + | | style="text-align: center; "|40 |
||
| + | | style="text-align: center; "|90 |
||
| + | | style="text-align: center; "|40 |
||
| + | | style="text-align: center; "|35 |
||
| + | | style="text-align: center; "|40 |
||
| + | | style="text-align: center; "|90 |
||
| + | | style="text-align: center; "|90 |
||
| + | | style="text-align: center; "|70 |
||
| + | | style="text-align: center; "|90 |
||
| + | |- |
||
| + | | style="white-space: nowrap; text-align: center; "|Tentacles (Unbound) |
||
| + | | style="text-align: center; "|70 |
||
| + | | style="text-align: center; "|90 |
||
| + | | style="text-align: center; "|80 |
||
| + | | style="text-align: center; "|90 |
||
| + | | style="text-align: center; "|45 |
||
| + | | style="text-align: center; "|90 |
||
| + | | style="text-align: center; "|90 |
||
| + | | style="text-align: center; "|60 |
||
| + | | style="text-align: center; "|90 |
||
| + | |- |
||
| + | | style="white-space: nowrap; text-align: center; "|Body |
||
| + | | style="text-align: center; "|100 |
||
| + | | style="text-align: center; "|100 |
||
| + | | style="text-align: center; "|100 |
||
| + | | style="text-align: center; "|100 |
||
| + | | style="text-align: center; "|100 |
||
| + | | style="text-align: center; "|100 |
||
| + | | style="text-align: center; "|100 |
||
| + | | style="text-align: center; "|100 |
||
| + | | style="text-align: center; "|100 |
||
| + | |- |
||
| + | | style="white-space: nowrap; text-align: center; "|Feet |
||
| + | | style="text-align: center; "|40 |
||
| + | | style="text-align: center; "|60 |
||
| + | | style="text-align: center; "|50 |
||
| + | | style="text-align: center; "|70 |
||
| + | | style="text-align: center; "|80 |
||
| + | | style="text-align: center; "|90 |
||
| + | | style="text-align: center; "|90 |
||
| + | | style="text-align: center; "|70 |
||
| + | | style="text-align: center; "|90 |
||
| + | |- |
||
| + | | style="white-space: nowrap; text-align: center; "|Feather Shoulders |
||
| + | | style="text-align: center; "|90 |
||
| + | | style="text-align: center; "|90 |
||
| + | | style="text-align: center; "|90 |
||
| + | | style="text-align: center; "|90 |
||
| + | | style="text-align: center; "|60 |
||
| + | | style="text-align: center; "|90 |
||
| + | | style="text-align: center; "|90 |
||
| + | | style="text-align: center; "|90 |
||
| + | | style="text-align: center; "|90 |
||
| + | |- |
||
| + | | style="white-space: nowrap; text-align: center; "|Spine |
||
| + | | style="text-align: center; "|30 |
||
| + | | style="text-align: center; "|90 |
||
| + | | style="text-align: center; "|90 |
||
| + | | style="text-align: center; "|90 |
||
| + | | style="text-align: center; "|90 |
||
| + | | style="text-align: center; "|90 |
||
| + | | style="text-align: center; "|90 |
||
| + | | style="text-align: center; "|90 |
||
| + | | style="text-align: center; "|90 |
||
| + | |} |
||
| + | |-| |
||
| + | Unbound= |
||
| + | {| border="0" cellpadding="1" cellspacing="0" width="100%" |
||
| + | ! rowspan="2" scope="col"|Part |
||
| + | ! colspan="2" rowspan="1" scope="col" style="text-align: center; "|Gun |
||
| + | ! colspan="3" rowspan="1" scope="col" style="text-align: center; "|Blade |
||
| + | ! colspan="4" rowspan="1" scope="col" style="text-align: center; "|Elemental |
||
| + | |- |
||
| + | ! scope="col" style="text-align: center; "|Crush |
||
| + | ! scope="col" style="text-align: center; "|Pierce |
||
| + | ! scope="col" style="text-align: center; "|Sunder |
||
| + | ! scope="col" style="text-align: center; "|Crush |
||
| + | ! scope="col" style="text-align: center; "|Pierce |
||
| + | ! scope="col" style="text-align: center; "|Blaze |
||
| + | ! scope="col" style="text-align: center; "|Freeze |
||
| + | ! scope="col" style="text-align: center; "|Spark |
||
| + | ! scope="col" style="text-align: center; "|Divine |
||
| + | |- |
||
| + | | style="white-space: nowrap; text-align: center; "|Goddess (Unbound) |
||
| + | | style="text-align: center; "|(70) |
||
| + | | style="text-align: center; "|90 |
||
| + | | style="text-align: center; "|(10) |
||
| + | | style="text-align: center; "|(10) |
||
| + | | style="text-align: center; "|(20) |
||
| + | | style="text-align: center; "|90 |
||
| + | | style="text-align: center; "|90 |
||
| + | | style="text-align: center; "|(70) |
||
| + | | style="text-align: center; "|90 |
||
| + | |- |
||
| + | | style="white-space: nowrap; text-align: center; "|Horn (Unbound) |
||
| + | | style="text-align: center; "|40 |
||
| + | | style="text-align: center; "|90 |
||
| + | | style="text-align: center; "|40 |
||
| + | | style="text-align: center; "|(20) |
||
| + | | style="text-align: center; "|40 |
||
| + | | style="text-align: center; "|90 |
||
| + | | style="text-align: center; "|90 |
||
| + | | style="text-align: center; "|70 |
||
| + | | style="text-align: center; "|90 |
||
| + | |- |
||
| + | | style="white-space: nowrap; text-align: center; "|Tentacles (Unbound) |
||
| + | | style="text-align: center; "|70 |
||
| + | | style="text-align: center; "|90 |
||
| + | | style="text-align: center; "|80 |
||
| + | | style="text-align: center; "|90 |
||
| + | | style="text-align: center; "|(40) |
||
| + | | style="text-align: center; "|90 |
||
| + | | style="text-align: center; "|90 |
||
| + | | style="text-align: center; "|60 |
||
| + | | style="text-align: center; "|90 |
||
| + | |- |
||
| + | | style="white-space: nowrap; text-align: center; "|Body |
||
| + | | style="text-align: center; "|100 |
||
| + | | style="text-align: center; "|100 |
||
| + | | style="text-align: center; "|100 |
||
| + | | style="text-align: center; "|100 |
||
| + | | style="text-align: center; "|100 |
||
| + | | style="text-align: center; "|100 |
||
| + | | style="text-align: center; "|100 |
||
| + | | style="text-align: center; "|100 |
||
| + | | style="text-align: center; "|100 |
||
| + | |- |
||
| + | | style="white-space: nowrap; text-align: center; "|Feet |
||
| + | | style="text-align: center; "|40 |
||
| + | | style="text-align: center; "|60 |
||
| + | | style="text-align: center; "|50 |
||
| + | | style="text-align: center; "|70 |
||
| + | | style="text-align: center; "|80 |
||
| + | | style="text-align: center; "|90 |
||
| + | | style="text-align: center; "|90 |
||
| + | | style="text-align: center; "|70 |
||
| + | | style="text-align: center; "|90 |
||
| + | |- |
||
| + | | style="white-space: nowrap; text-align: center; "|Feather Shoulders |
||
| + | | style="text-align: center; "|90 |
||
| + | | style="text-align: center; "|90 |
||
| + | | style="text-align: center; "|90 |
||
| + | | style="text-align: center; "|90 |
||
| + | | style="text-align: center; "|60 |
||
| + | | style="text-align: center; "|90 |
||
| + | | style="text-align: center; "|90 |
||
| + | | style="text-align: center; "|90 |
||
| + | | style="text-align: center; "|90 |
||
| + | |- |
||
| + | | style="white-space: nowrap; text-align: center; "|Spine |
||
| + | | style="text-align: center; "|30 |
||
| + | | style="text-align: center; "|90 |
||
| + | | style="text-align: center; "|90 |
||
| + | | style="text-align: center; "|90 |
||
| + | | style="text-align: center; "|90 |
||
| + | | style="text-align: center; "|90 |
||
| + | | style="text-align: center; "|90 |
||
| + | | style="text-align: center; "|90 |
||
| + | | style="text-align: center; "|90 |
||
| + | |} |
||
| + | |-| |
||
| + | Enraged= |
||
| + | {| border="0" cellpadding="1" cellspacing="0" width="100%" |
||
| + | ! rowspan="2" scope="col"|Part |
||
| + | ! colspan="2" rowspan="1" scope="col" style="text-align: center; "|Gun |
||
| + | ! colspan="3" rowspan="1" scope="col" style="text-align: center; "|Blade |
||
| + | ! colspan="4" rowspan="1" scope="col" style="text-align: center; "|Elemental |
||
| + | |- |
||
| + | ! scope="col" style="text-align: center; "|Crush |
||
| + | ! scope="col" style="text-align: center; "|Pierce |
||
| + | ! scope="col" style="text-align: center; "|Sunder |
||
| + | ! scope="col" style="text-align: center; "|Crush |
||
| + | ! scope="col" style="text-align: center; "|Pierce |
||
| + | ! scope="col" style="text-align: center; "|Blaze |
||
| + | ! scope="col" style="text-align: center; "|Freeze |
||
| + | ! scope="col" style="text-align: center; "|Spark |
||
| + | ! scope="col" style="text-align: center; "|Divine |
||
| + | |- |
||
| + | | style="white-space: nowrap; text-align: center; "|Goddess (Unbound) |
||
| + | | style="text-align: center; "|[70] |
||
| + | | style="text-align: center; "|90 |
||
| + | | style="text-align: center; "|[5] |
||
| + | | style="text-align: center; "|[5] |
||
| + | | style="text-align: center; "|[10] |
||
| + | | style="text-align: center; "|90 |
||
| + | | style="text-align: center; "|90 |
||
| + | | style="text-align: center; "|[70] |
||
| + | | style="text-align: center; "|90 |
||
| + | |- |
||
| + | | style="white-space: nowrap; text-align: center; "|Horn (Unbound) |
||
| + | | style="text-align: center; "|40 |
||
| + | | style="text-align: center; "|90 |
||
| + | | style="text-align: center; "|[35] |
||
| + | | style="text-align: center; "|[20] |
||
| + | | style="text-align: center; "|40 |
||
| + | | style="text-align: center; "|90 |
||
| + | | style="text-align: center; "|90 |
||
| + | | style="text-align: center; "|70 |
||
| + | | style="text-align: center; "|90 |
||
| + | |- |
||
| + | | style="white-space: nowrap; text-align: center; "|Tentacles (Unbound) |
||
| + | | style="text-align: center; "|70 |
||
| + | | style="text-align: center; "|90 |
||
| + | | style="text-align: center; "|80 |
||
| + | | style="text-align: center; "|90 |
||
| + | | style="text-align: center; "|[40] |
||
| + | | style="text-align: center; "|90 |
||
| + | | style="text-align: center; "|90 |
||
| + | | style="text-align: center; "|[50] |
||
| + | | style="text-align: center; "|90 |
||
| + | |- |
||
| + | | style="white-space: nowrap; text-align: center; "|Body |
||
| + | | style="text-align: center; "|[90] |
||
| + | | style="text-align: center; "|[90] |
||
| + | | style="text-align: center; "|[90] |
||
| + | | style="text-align: center; "|[90] |
||
| + | | style="text-align: center; "|[90] |
||
| + | | style="text-align: center; "|[90] |
||
| + | | style="text-align: center; "|[90] |
||
| + | | style="text-align: center; "|[90] |
||
| + | | style="text-align: center; "|[90] |
||
| + | |- |
||
| + | | style="white-space: nowrap; text-align: center; "|Feet |
||
| + | | style="text-align: center; "|[30] |
||
| + | | style="text-align: center; "|[50] |
||
| + | | style="text-align: center; "|[40] |
||
| + | | style="text-align: center; "|[60] |
||
| + | | style="text-align: center; "|[60] |
||
| + | | style="text-align: center; "|90 |
||
| + | | style="text-align: center; "|90 |
||
| + | | style="text-align: center; "|70 |
||
| + | | style="text-align: center; "|90 |
||
| + | |- |
||
| + | | style="white-space: nowrap; text-align: center; "|Feather Shoulders |
||
| + | | style="text-align: center; "|90 |
||
| + | | style="text-align: center; "|90 |
||
| + | | style="text-align: center; "|90 |
||
| + | | style="text-align: center; "|90 |
||
| + | | style="text-align: center; "|60 |
||
| + | | style="text-align: center; "|90 |
||
| + | | style="text-align: center; "|90 |
||
| + | | style="text-align: center; "|90 |
||
| + | | style="text-align: center; "|90 |
||
| + | |- |
||
| + | | style="white-space: nowrap; text-align: center; "|Spine |
||
| + | | style="text-align: center; "|30 |
||
| + | | style="text-align: center; "|90 |
||
| + | | style="text-align: center; "|90 |
||
| + | | style="text-align: center; "|90 |
||
| + | | style="text-align: center; "|90 |
||
| + | | style="text-align: center; "|90 |
||
| + | | style="text-align: center; "|90 |
||
| + | | style="text-align: center; "|90 |
||
| + | | style="text-align: center; "|90 |
||
| + | |} |
||
| + | |-| |
||
| + | Unbound-Enraged= |
||
{| border="0" cellpadding="1" cellspacing="0" width="100%" |
{| border="0" cellpadding="1" cellspacing="0" width="100%" |
||
! rowspan="2" scope="col"|Part |
! rowspan="2" scope="col"|Part |
||
| Line 119: | Line 414: | ||
|- |
|- |
||
| style="white-space: nowrap; text-align: center; "|Goddess (Unbound) |
| style="white-space: nowrap; text-align: center; "|Goddess (Unbound) |
||
| − | | style="text-align: center; "| |
+ | | style="text-align: center; "|[70] |
| style="text-align: center; "|90 |
| style="text-align: center; "|90 |
||
| − | | style="text-align: center; "| |
+ | | style="text-align: center; "|[5] |
| − | | style="text-align: center; "| |
+ | | style="text-align: center; "|[5] |
| − | | style="text-align: center; "| |
+ | | style="text-align: center; "|[10] |
| style="text-align: center; "|90 |
| style="text-align: center; "|90 |
||
| style="text-align: center; "|90 |
| style="text-align: center; "|90 |
||
| − | | style="text-align: center; "| |
+ | | style="text-align: center; "|[70] |
| style="text-align: center; "|90 |
| style="text-align: center; "|90 |
||
|- |
|- |
||
| Line 132: | Line 427: | ||
| style="text-align: center; "|40 |
| style="text-align: center; "|40 |
||
| style="text-align: center; "|90 |
| style="text-align: center; "|90 |
||
| − | | style="text-align: center; "| |
+ | | style="text-align: center; "|([30]) |
| − | | style="text-align: center; "| |
+ | | style="text-align: center; "|([15]) |
| − | | style="text-align: center; "| |
+ | | style="text-align: center; "|([35]) |
| style="text-align: center; "|90 |
| style="text-align: center; "|90 |
||
| style="text-align: center; "|90 |
| style="text-align: center; "|90 |
||
| Line 143: | Line 438: | ||
| style="text-align: center; "|70 |
| style="text-align: center; "|70 |
||
| style="text-align: center; "|90 |
| style="text-align: center; "|90 |
||
| − | | style="text-align: center; "| |
+ | | style="text-align: center; "|([70]) |
| − | | style="text-align: center; "| |
+ | | style="text-align: center; "|([70]) |
| − | | style="text-align: center; "| |
+ | | style="text-align: center; "|([35]) |
| style="text-align: center; "|90 |
| style="text-align: center; "|90 |
||
| style="text-align: center; "|90 |
| style="text-align: center; "|90 |
||
| − | | style="text-align: center; "| |
+ | | style="text-align: center; "|[50] |
| style="text-align: center; "|90 |
| style="text-align: center; "|90 |
||
|- |
|- |
||
| style="white-space: nowrap; text-align: center; "|Body |
| style="white-space: nowrap; text-align: center; "|Body |
||
| − | | style="text-align: center; "| |
+ | | style="text-align: center; "|[90] |
| − | | style="text-align: center; "| |
+ | | style="text-align: center; "|[90] |
| − | | style="text-align: center; "| |
+ | | style="text-align: center; "|[90] |
| − | | style="text-align: center; "| |
+ | | style="text-align: center; "|[90] |
| − | | style="text-align: center; "| |
+ | | style="text-align: center; "|[90] |
| − | | style="text-align: center; "| |
+ | | style="text-align: center; "|[90] |
| − | | style="text-align: center; "| |
+ | | style="text-align: center; "|[90] |
| − | | style="text-align: center; "| |
+ | | style="text-align: center; "|[90] |
| − | | style="text-align: center; "| |
+ | | style="text-align: center; "|[90] |
|- |
|- |
||
| style="white-space: nowrap; text-align: center; "|Feet |
| style="white-space: nowrap; text-align: center; "|Feet |
||
| − | | style="text-align: center; "| |
+ | | style="text-align: center; "|[30] |
| − | | style="text-align: center; "| |
+ | | style="text-align: center; "|[50] |
| − | | style="text-align: center; "| |
+ | | style="text-align: center; "|[40] |
| − | | style="text-align: center; "| |
+ | | style="text-align: center; "|[60] |
| − | | style="text-align: center; "| |
+ | | style="text-align: center; "|[60] |
| style="text-align: center; "|90 |
| style="text-align: center; "|90 |
||
| style="text-align: center; "|90 |
| style="text-align: center; "|90 |
||
| Line 195: | Line 490: | ||
| style="text-align: center; "|90 |
| style="text-align: center; "|90 |
||
|} |
|} |
||
| + | </tabber> |
||
| − | Notes: |
||
| + | '''Notes:''' |
||
*[Enraged] status will override Normal and (Unbound) attributes for its duration. |
*[Enraged] status will override Normal and (Unbound) attributes for its duration. |
||
*Some [Enraged] attributes will only take effect if the part is (Unbound). |
*Some [Enraged] attributes will only take effect if the part is (Unbound). |
||
Revision as of 06:59, 20 February 2013
|
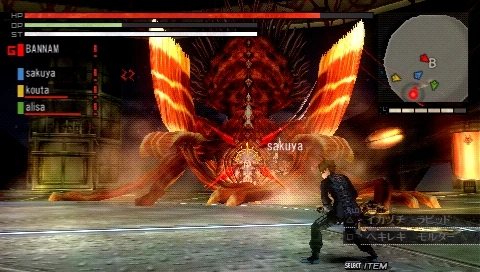
A giant Type 1 Deusphage. A statue of a goddess rests where its head is believed to be, giving it a godly aura. Origin is unknown. Its large fireballs, lasers, and tentacles have the most dangerous range and power, but blade attacks are effective against the statue of the goddess. Use stun grenades and concentrate your attacks to find the moment of victory.
Blade Attacking Tips:
Gun Attacking Tips:
Status Resistances:
Enraged Effects:
Unbounding Tips:
Other Useful Tips:
| |||||||||||||||||||||||||||||||||||||||||

| Part | Gun | Blade | Elemental | ||||||
|---|---|---|---|---|---|---|---|---|---|
| Crush | Pierce | Sunder | Crush | Pierce | Blaze | Freeze | Spark | Divine | |
| Goddess (Unbound) | 80 | 90 | 20 | 20 | 30 | 90 | 90 | 80 | 90 |
| Horn (Unbound) | 40 | 90 | 40 | 35 | 40 | 90 | 90 | 70 | 90 |
| Tentacles (Unbound) | 70 | 90 | 80 | 90 | 45 | 90 | 90 | 60 | 90 |
| Body | 100 | 100 | 100 | 100 | 100 | 100 | 100 | 100 | 100 |
| Feet | 40 | 60 | 50 | 70 | 80 | 90 | 90 | 70 | 90 |
| Feather Shoulders | 90 | 90 | 90 | 90 | 60 | 90 | 90 | 90 | 90 |
| Spine | 30 | 90 | 90 | 90 | 90 | 90 | 90 | 90 | 90 |
| Part | Gun | Blade | Elemental | ||||||
|---|---|---|---|---|---|---|---|---|---|
| Crush | Pierce | Sunder | Crush | Pierce | Blaze | Freeze | Spark | Divine | |
| Goddess (Unbound) | (70) | 90 | (10) | (10) | (20) | 90 | 90 | (70) | 90 |
| Horn (Unbound) | 40 | 90 | 40 | (20) | 40 | 90 | 90 | 70 | 90 |
| Tentacles (Unbound) | 70 | 90 | 80 | 90 | (40) | 90 | 90 | 60 | 90 |
| Body | 100 | 100 | 100 | 100 | 100 | 100 | 100 | 100 | 100 |
| Feet | 40 | 60 | 50 | 70 | 80 | 90 | 90 | 70 | 90 |
| Feather Shoulders | 90 | 90 | 90 | 90 | 60 | 90 | 90 | 90 | 90 |
| Spine | 30 | 90 | 90 | 90 | 90 | 90 | 90 | 90 | 90 |
| Part | Gun | Blade | Elemental | ||||||
|---|---|---|---|---|---|---|---|---|---|
| Crush | Pierce | Sunder | Crush | Pierce | Blaze | Freeze | Spark | Divine | |
| Goddess (Unbound) | [70] | 90 | [5] | [5] | [10] | 90 | 90 | [70] | 90 |
| Horn (Unbound) | 40 | 90 | [35] | [20] | 40 | 90 | 90 | 70 | 90 |
| Tentacles (Unbound) | 70 | 90 | 80 | 90 | [40] | 90 | 90 | [50] | 90 |
| Body | [90] | [90] | [90] | [90] | [90] | [90] | [90] | [90] | [90] |
| Feet | [30] | [50] | [40] | [60] | [60] | 90 | 90 | 70 | 90 |
| Feather Shoulders | 90 | 90 | 90 | 90 | 60 | 90 | 90 | 90 | 90 |
| Spine | 30 | 90 | 90 | 90 | 90 | 90 | 90 | 90 | 90 |
| Part | Gun | Blade | Elemental | ||||||
|---|---|---|---|---|---|---|---|---|---|
| Crush | Pierce | Sunder | Crush | Pierce | Blaze | Freeze | Spark | Divine | |
| Goddess (Unbound) | [70] | 90 | [5] | [5] | [10] | 90 | 90 | [70] | 90 |
| Horn (Unbound) | 40 | 90 | ([30]) | ([15]) | ([35]) | 90 | 90 | 70 | 90 |
| Tentacles (Unbound) | 70 | 90 | ([70]) | ([70]) | ([35]) | 90 | 90 | [50] | 90 |
| Body | [90] | [90] | [90] | [90] | [90] | [90] | [90] | [90] | [90] |
| Feet | [30] | [50] | [40] | [60] | [60] | 90 | 90 | 70 | 90 |
| Feather Shoulders | 90 | 90 | 90 | 90 | 60 | 90 | 90 | 90 | 90 |
| Spine | 30 | 90 | 90 | 90 | 90 | 90 | 90 | 90 | 90 |
Notes:
- [Enraged] status will override Normal and (Unbound) attributes for its duration.
- Some [Enraged] attributes will only take effect if the part is (Unbound).
|

|

|

|