No edit summary |
(Adding Aragami Materials (still needs to be verified since this was translated using google only)) |
||
| Line 22: | Line 22: | ||
{{HeadingB|Battle Information}} |
{{HeadingB|Battle Information}} |
||
| − | <div class="mw-collapsible mw-collapsed" style="width:100%> |
+ | <div class="mw-collapsible mw-collapsed" style="width:100%>'''Blade Attacking Tips:'''<div class="mw-collapsible-content"> |
| − | '''Blade Attacking Tips:'''<div class="mw-collapsible-content"> |
||
*<u>''Pierce/Short Blades:''</u> The tentacles will be your primary target when fighting Ouroboros. Continuous attacks to this part will inflict '''Down''' on Ouroboros. The compound eyes will become weak to melee pierce attacks once unbound. |
*<u>''Pierce/Short Blades:''</u> The tentacles will be your primary target when fighting Ouroboros. Continuous attacks to this part will inflict '''Down''' on Ouroboros. The compound eyes will become weak to melee pierce attacks once unbound. |
||
*<u>''Sunder/Long Blades:''</u> Concentrate your attacks on the tentacles as continuous attacks to this part will inflict '''Down''' on Ouroboros. You can also spam bomb/radial Impulse Edge on both feet to inflict '''Down '''on Ouroboros. The compound eyes will become weak to melee sunder attacks once unbound. |
*<u>''Sunder/Long Blades:''</u> Concentrate your attacks on the tentacles as continuous attacks to this part will inflict '''Down''' on Ouroboros. You can also spam bomb/radial Impulse Edge on both feet to inflict '''Down '''on Ouroboros. The compound eyes will become weak to melee sunder attacks once unbound. |
||
| Line 30: | Line 29: | ||
*Pay close attention to your distance when fighting an Ouroboros. Stay out of its melee range but don't go too far from it as it will start firing its laser cannon attacks on you. Attack only during the backswing animation of its attacks then back-step and return to the proper distance. |
*Pay close attention to your distance when fighting an Ouroboros. Stay out of its melee range but don't go too far from it as it will start firing its laser cannon attacks on you. Attack only during the backswing animation of its attacks then back-step and return to the proper distance. |
||
</div></div> |
</div></div> |
||
| − | <div class="mw-collapsible mw-collapsed" style="width:100%> |
+ | <div class="mw-collapsible mw-collapsed" style="width:100%>'''Gun Attacking Tips:'''<div class="mw-collapsible-content"> |
| − | '''Gun Attacking Tips:'''<div class="mw-collapsible-content"> |
||
*<u>''Pierce/Assault and Sniper Gun:''</u> Fire on Ouroboros' compound eyes as these are weak to shot/laser bullets and become even weaker to it once unbound. While enraged, you can opt to fire on both of its feet as its defense against shot/laser bullets will significantly decrease. Firing continuously on Ouroboros' both feet will send it into a '''Downed''' state. Ouroboros is also weak against its own Aragami bullets, which are all pierce/divine type bullets. |
*<u>''Pierce/Assault and Sniper Gun:''</u> Fire on Ouroboros' compound eyes as these are weak to shot/laser bullets and become even weaker to it once unbound. While enraged, you can opt to fire on both of its feet as its defense against shot/laser bullets will significantly decrease. Firing continuously on Ouroboros' both feet will send it into a '''Downed''' state. Ouroboros is also weak against its own Aragami bullets, which are all pierce/divine type bullets. |
||
*<u>''Crush/Blast Gun:''</u> Fire your bomb/radial bullets on Ouroboros' both feet to maximize your damage and eventually send it into a '''Downed''' state. Both feet's defense against crush type bullets will decrease even more once its unbound or when Ouroboros is enraged. |
*<u>''Crush/Blast Gun:''</u> Fire your bomb/radial bullets on Ouroboros' both feet to maximize your damage and eventually send it into a '''Downed''' state. Both feet's defense against crush type bullets will decrease even more once its unbound or when Ouroboros is enraged. |
||
*<u>''Elemental:''</u> Elemental attributes are not as effective on Ouroboros as compared to physical attacks but since all bullets use an element, any element other than spark is effective. |
*<u>''Elemental:''</u> Elemental attributes are not as effective on Ouroboros as compared to physical attacks but since all bullets use an element, any element other than spark is effective. |
||
</div></div> |
</div></div> |
||
| − | <div class="mw-collapsible mw-collapsed" style="width:100%> |
+ | <div class="mw-collapsible mw-collapsed" style="width:100%>'''Status Resistances:'''<div class="mw-collapsible-content"> |
| − | '''Status Resistances:'''<div class="mw-collapsible-content"> |
||
{| border="0" cellpadding="2" cellspacing="2" width="100%" |
{| border="0" cellpadding="2" cellspacing="2" width="100%" |
||
! width="33%"|Condition |
! width="33%"|Condition |
||
| Line 56: | Line 53: | ||
|} |
|} |
||
</div></div> |
</div></div> |
||
| − | <div class="mw-collapsible mw-collapsed" style="width:100%> |
+ | <div class="mw-collapsible mw-collapsed" style="width:100%>'''Enraged Effects:'''<div class="mw-collapsible-content"> |
| − | '''Enraged Effects:'''<div class="mw-collapsible-content"> |
||
*<u>''Rage Indicator:''</u> Small flashes of light is seen on its compound eyes. |
*<u>''Rage Indicator:''</u> Small flashes of light is seen on its compound eyes. |
||
*Ouroboros' speed and aggressiveness will noticeably increase. |
*Ouroboros' speed and aggressiveness will noticeably increase. |
||
| Line 63: | Line 59: | ||
*Ouroboros will gain access to its Mow Down attack (a very quick and powerful 360 degrees spinning attack). |
*Ouroboros will gain access to its Mow Down attack (a very quick and powerful 360 degrees spinning attack). |
||
</div></div> |
</div></div> |
||
| − | <div class="mw-collapsible mw-collapsed" style="width:100%> |
+ | <div class="mw-collapsible mw-collapsed" style="width:100%>'''Unbounding Tips:'''<div class="mw-collapsible-content"> |
| − | '''Unbounding Tips:'''<div class="mw-collapsible-content"> |
||
*<u>''Eyes:''</u> Firing shot/laser bullets or its own Aragami bullets can quickly unbound this part. |
*<u>''Eyes:''</u> Firing shot/laser bullets or its own Aragami bullets can quickly unbound this part. |
||
*<u>''Horn:''</u> Buster Blades make quick work in unbounding this part. Wait for Ouroboros to attack and target the right side of its horn (on the side of the eyes) using aerial square attacks once it exposes its head. You can also use Charge Crush on the right side of the horn if Ouroboros is in a '''Downed''' state. |
*<u>''Horn:''</u> Buster Blades make quick work in unbounding this part. Wait for Ouroboros to attack and target the right side of its horn (on the side of the eyes) using aerial square attacks once it exposes its head. You can also use Charge Crush on the right side of the horn if Ouroboros is in a '''Downed''' state. |
||
*<u>''Both Feet:''</u> Buster Blades work best in unbounding this part but all physical attacks, whether blade or bullets, are effective once Ouroboros is enraged. |
*<u>''Both Feet:''</u> Buster Blades work best in unbounding this part but all physical attacks, whether blade or bullets, are effective once Ouroboros is enraged. |
||
</div></div> |
</div></div> |
||
| − | <div class="mw-collapsible mw-collapsed" style="width:100%> |
+ | <div class="mw-collapsible mw-collapsed" style="width:100%>'''Other Useful Tips:'''<div class="mw-collapsible-content"> |
| − | '''Other Useful Tips:'''<div class="mw-collapsible-content"> |
||
*<u>''Weak Points:''</u> You can inflict '''Down''' on an Ouroboros by continuously attacking the following parts: |
*<u>''Weak Points:''</u> You can inflict '''Down''' on an Ouroboros by continuously attacking the following parts: |
||
**Both Legs using any Buster Blade with a high enough crush attribute. |
**Both Legs using any Buster Blade with a high enough crush attribute. |
||
| Line 446: | Line 440: | ||
|} |
|} |
||
</tabber> |
</tabber> |
||
| − | '''Notes:''' |
+ | '''Notes:''' |
*[Enraged] status will override Normal and (Unbound) attributes for its duration except for the both legs part's gun crush defense attribute. In this case, the (Unbound) attribute will override the [Enraged] attribute. |
*[Enraged] status will override Normal and (Unbound) attributes for its duration except for the both legs part's gun crush defense attribute. In this case, the (Unbound) attribute will override the [Enraged] attribute. |
||
| + | |||
| + | {{HeadingB|Aragami Materials}} |
||
| + | <tabber> |
||
| + | Devour Rates= |
||
| + | {| border="0" cellpadding="0" cellspacing="0" style="border-collapse: collapse;width:100%" width="100%" str="" |
||
| + | |- height="17" style="height:12.75pt" |
||
| + | | class="xl22" height="34" rowspan="2" style="height:25.5pt;width:20pt;text-align:center;" width="26"|'''Pic''' |
||
| + | | class="xl22" rowspan="2" style="width:89pt;text-align:center;" width="118"|'''Material Name''' |
||
| + | | class="xl22" colspan="4" style="border-left-style:none;width:152pt;text-align:center;" width="204"|'''Devour Rates per Difficulty''' |
||
| + | |- height="17" style="height:12.75pt" |
||
| + | | class="xl22" height="17" style="height:12.75pt;border-top-style:none;border-left-style:none;text-align:center;" num=""|'''5''' |
||
| + | | class="xl22" style="border-top-style:none;border-left-style:none;text-align:center;" num=""|'''6''' |
||
| + | | class="xl22" style="border-top-style:none;border-left-style:none;text-align:center;" num=""|'''7''' |
||
| + | | class="xl22" style="border-top-style:none;border-left-style:none;text-align:center;" num=""|'''10''' |
||
| + | |- height="17" style="height:12.75pt" |
||
| + | | class="xl23" height="17" style="height:12.75pt;border-top-style:none;text-align:center;"|[[File:Rock.png|20px]] |
||
| + | | class="xl23" style="border-top-style:none;border-left-style:none;text-align:center;"|Chaotic Armor (1) |
||
| + | | class="xl24" style="border-top-style:none;border-left-style:none;color:inherit;text-align:center;" num="0.21"|21.00% |
||
| + | | class="xl24" style="border-top-style:none;border-left-style:none;color:inherit;text-align:center;" num="0.2"|20.00% |
||
| + | | class="xl23" style="border-top-style:none;border-left-style:none;text-align:center;"| |
||
| + | | class="xl23" style="border-top-style:none;border-left-style:none;text-align:center;"| |
||
| + | |- height="17" style="height:12.75pt" |
||
| + | | class="xl23" height="17" style="height:12.75pt;border-top-style:none;text-align:center;"|[[File:Rock.png|20px]] |
||
| + | | class="xl23" style="border-top-style:none;border-left-style:none;text-align:center;"|Chaotic Moss |
||
| + | | class="xl24" style="border-top-style:none;border-left-style:none;color:inherit;text-align:center;" num="0.2"|20.00% |
||
| + | | class="xl24" style="border-top-style:none;border-left-style:none;color:inherit;text-align:center;" num="0.2"|20.00% |
||
| + | | class="xl23" style="border-top-style:none;border-left-style:none;text-align:center;"| |
||
| + | | class="xl23" style="border-top-style:none;border-left-style:none;text-align:center;"| |
||
| + | |- height="17" style="height:12.75pt" |
||
| + | | class="xl23" height="17" style="height:12.75pt;border-top-style:none;text-align:center;"|[[File:Rock.png|20px]] |
||
| + | | class="xl23" style="border-top-style:none;border-left-style:none;text-align:center;"|Chaotic Claw |
||
| + | | class="xl24" style="border-top-style:none;border-left-style:none;color:inherit;text-align:center;" num="0.19"|19.00% |
||
| + | | class="xl24" style="border-top-style:none;border-left-style:none;color:inherit;text-align:center;" num="0.22"|22.00% |
||
| + | | class="xl24" style="border-top-style:none;border-left-style:none;color:inherit;text-align:center;" num="0.09"|9.00% |
||
| + | | class="xl23" style="border-top-style:none;border-left-style:none;text-align:center;"| |
||
| + | |- height="17" style="height:12.75pt" |
||
| + | | class="xl23" height="17" style="height:12.75pt;border-top-style:none;text-align:center;"|[[File:Rock.png|20px]] |
||
| + | | class="xl23" style="border-top-style:none;border-left-style:none;text-align:center;"|Chaotic Horn |
||
| + | | class="xl24" style="border-top-style:none;border-left-style:none;color:inherit;text-align:center;" num="0.16"|16.00% |
||
| + | | class="xl24" style="border-top-style:none;border-left-style:none;color:inherit;text-align:center;" num="0.16"|16.00% |
||
| + | | class="xl23" style="border-top-style:none;border-left-style:none;text-align:center;"| |
||
| + | | class="xl23" style="border-top-style:none;border-left-style:none;text-align:center;"| |
||
| + | |- height="17" style="height:12.75pt" |
||
| + | | class="xl23" height="17" style="height:12.75pt;border-top-style:none;text-align:center;"|[[File:Rock.png|20px]] |
||
| + | | class="xl23" style="border-top-style:none;border-left-style:none;text-align:center;"|Chaotic Gun |
||
| + | | class="xl24" style="border-top-style:none;border-left-style:none;color:inherit;text-align:center;" num="0.15"|15.00% |
||
| + | | class="xl24" style="border-top-style:none;border-left-style:none;color:inherit;text-align:center;" num="0.15"|15.00% |
||
| + | | class="xl24" style="border-top-style:none;border-left-style:none;color:inherit;text-align:center;" num="0.15"|15.00% |
||
| + | | class="xl23" style="border-top-style:none;border-left-style:none;text-align:center;"| |
||
| + | |- height="17" style="height:12.75pt" |
||
| + | | class="xl23" height="17" style="height:12.75pt;border-top-style:none;text-align:center;"|[[File:Beaker.png|20px]] |
||
| + | | class="xl23" style="border-top-style:none;border-left-style:none;text-align:center;"|Chaotic Tektite |
||
| + | | class="xl24" style="border-top-style:none;border-left-style:none;color:inherit;text-align:center;" num="0.09"|9.00% |
||
| + | | class="xl24" style="border-top-style:none;border-left-style:none;color:inherit;text-align:center;" num="0.07"|7.00% |
||
| + | | class="xl23" style="border-top-style:none;border-left-style:none;text-align:center;"| |
||
| + | | class="xl23" style="border-top-style:none;border-left-style:none;color:inherit;text-align:center;"| |
||
| + | |- height="17" style="height:12.75pt" |
||
| + | | class="xl23" height="17" style="height:12.75pt;border-top-style:none;text-align:center;"|[[File:Rock.png|20px]] |
||
| + | | class="xl23" style="border-top-style:none;border-left-style:none;text-align:center;"|Chaotic Femur |
||
| + | | class="xl23" style="border-top-style:none;border-left-style:none;text-align:center;"| |
||
| + | | class="xl23" style="border-top-style:none;border-left-style:none;text-align:center;"| |
||
| + | | class="xl24" style="border-top-style:none;border-left-style:none;color:inherit;text-align:center;" num="0.3"|30.00% |
||
| + | | class="xl23" style="border-top-style:none;border-left-style:none;text-align:center;"| |
||
| + | |- height="17" style="height:12.75pt" |
||
| + | | class="xl23" height="17" style="height:12.75pt;border-top-style:none;text-align:center;"|[[File:Rock.png|20px]] |
||
| + | | class="xl23" style="border-top-style:none;border-left-style:none;text-align:center;"|Chaotic Armor (2) |
||
| + | | class="xl23" style="border-top-style:none;border-left-style:none;text-align:center;"| |
||
| + | | class="xl23" style="border-top-style:none;border-left-style:none;text-align:center;"| |
||
| + | | class="xl24" style="border-top-style:none;border-left-style:none;color:inherit;text-align:center;" num="0.28"|28.00% |
||
| + | | class="xl24" style="border-top-style:none;border-left-style:none;color:inherit;text-align:center;" num="0.218"|21.80% |
||
| + | |- height="17" style="height:12.75pt" |
||
| + | | class="xl23" height="17" style="height:12.75pt;border-top-style:none;text-align:center;"|[[File:Rock.png|20px]] |
||
| + | | class="xl23" style="border-top-style:none;border-left-style:none;text-align:center;"|Chaotic Spark Gun |
||
| + | | class="xl23" style="border-top-style:none;border-left-style:none;text-align:center;"| |
||
| + | | class="xl23" style="border-top-style:none;border-left-style:none;text-align:center;"| |
||
| + | | class="xl24" style="border-top-style:none;border-left-style:none;color:inherit;text-align:center;" num="0.15"|15.00% |
||
| + | | class="xl23" style="border-top-style:none;border-left-style:none;text-align:center;"| |
||
| + | |- height="17" style="height:12.75pt" |
||
| + | | class="xl23" height="17" style="height:12.75pt;border-top-style:none;text-align:center;"|[[File:Beaker.png|20px]] |
||
| + | | class="xl23" style="border-top-style:none;border-left-style:none;text-align:center;"|Chaotic Onyx |
||
| + | | class="xl23" style="border-top-style:none;border-left-style:none;text-align:center;"| |
||
| + | | class="xl23" style="border-top-style:none;border-left-style:none;text-align:center;"| |
||
| + | | class="xl24" style="border-top-style:none;border-left-style:none;color:inherit;text-align:center;" num="0.03"|3.00% |
||
| + | | class="xl23" style="border-top-style:none;border-left-style:none;text-align:center;"| |
||
| + | |- height="17" style="height:12.75pt" |
||
| + | | class="xl23" height="17" style="height:12.75pt;border-top-style:none;text-align:center;"|[[File:Rock.png|20px]] |
||
| + | | class="xl23" style="border-top-style:none;border-left-style:none;text-align:center;"|Abyssal Bone |
||
| + | | class="xl23" style="border-top-style:none;border-left-style:none;text-align:center;"| |
||
| + | | class="xl23" style="border-top-style:none;border-left-style:none;text-align:center;"| |
||
| + | | class="xl23" style="border-top-style:none;border-left-style:none;text-align:center;"| |
||
| + | | class="xl24" style="border-top-style:none;border-left-style:none;color:inherit;text-align:center;" num="0.36399999999999999"|36.40% |
||
| + | |- height="17" style="height:12.75pt" |
||
| + | | class="xl23" height="17" style="height:12.75pt;border-top-style:none;text-align:center;"|[[File:Rock.png|20px]] |
||
| + | | class="xl23" style="border-top-style:none;border-left-style:none;text-align:center;"|Abyssal Claw |
||
| + | | class="xl23" style="border-top-style:none;border-left-style:none;text-align:center;"| |
||
| + | | class="xl23" style="border-top-style:none;border-left-style:none;text-align:center;"| |
||
| + | | class="xl23" style="border-top-style:none;border-left-style:none;text-align:center;"| |
||
| + | | class="xl24" style="border-top-style:none;border-left-style:none;color:inherit;text-align:center;" num="0.22700000000000001"|22.70% |
||
| + | |- height="17" style="height:12.75pt" |
||
| + | | class="xl23" height="17" style="height:12.75pt;border-top-style:none;text-align:center;"|[[File:Rock.png|20px]] |
||
| + | | class="xl23" style="border-top-style:none;border-left-style:none;text-align:center;"|Abyssal Gun |
||
| + | | class="xl23" style="border-top-style:none;border-left-style:none;text-align:center;"| |
||
| + | | class="xl23" style="border-top-style:none;border-left-style:none;text-align:center;"| |
||
| + | | class="xl23" style="border-top-style:none;border-left-style:none;text-align:center;"| |
||
| + | | class="xl24" style="border-top-style:none;border-left-style:none;color:inherit;text-align:center;" num="0.13600000000000001"|13.60% |
||
| + | |- height="17" style="height:12.75pt" |
||
| + | | class="xl23" height="17" style="height:12.75pt;border-top-style:none;text-align:center;"|[[File:Beaker.png|20px]] |
||
| + | | class="xl23" style="border-top-style:none;border-left-style:none;text-align:center;"|Abyssal Crystal |
||
| + | | class="xl23" style="border-top-style:none;border-left-style:none;text-align:center;"| |
||
| + | | class="xl23" style="border-top-style:none;border-left-style:none;text-align:center;"| |
||
| + | | class="xl23" style="border-top-style:none;border-left-style:none;text-align:center;"| |
||
| + | | class="xl24" style="border-top-style:none;border-left-style:none;color:inherit;text-align:center;" num="5.5E-2"|5.50% |
||
| + | |} |
||
| + | '''Note: '''There are two Chaotic Armors possibly due to a mistranslation. They have the same name but are treated as different materials. |
||
| + | |-| |
||
| + | Unbound Bonus Rates= |
||
| + | {| border="0" cellpadding="0" cellspacing="0" style="border-collapse: collapse;width:100%" width="100%" str="" |
||
| + | |- height="17" style="height:12.75pt" |
||
| + | | class="xl24" height="34" rowspan="2" style="height:25.5pt;width:48pt;color:inherit;text-align:center;" width="64"|'''Part''' |
||
| + | | class="xl24" rowspan="2" style="width:20pt;text-align:center;" width="27"|'''Pic''' |
||
| + | | class="xl24" rowspan="2" style="width:92pt;text-align:center;" width="123"|'''Material Name''' |
||
| + | | class="xl24" colspan="4" style="border-left-style:none;width:152pt;text-align:center;" width="204"|'''Bonus Rates per Difficulty''' |
||
| + | |- height="17" style="height:12.75pt" |
||
| + | | class="xl24" height="17" style="height:12.75pt;border-top-style:none;border-left-style:none;text-align:center;" num=""|'''5''' |
||
| + | | class="xl24" style="border-top-style:none;border-left-style:none;text-align:center;" num=""|'''6''' |
||
| + | | class="xl24" style="border-top-style:none;border-left-style:none;text-align:center;" num=""|'''7''' |
||
| + | | class="xl24" style="border-top-style:none;border-left-style:none;text-align:center;" num=""|'''10''' |
||
| + | |- height="17" style="height:12.75pt;color:inherit;margin-right:1px;padding-bottom: 2px;padding-top:2px" |
||
| + | | class="xl27" height="85" rowspan="5" style="height:63.75pt;border-top-style:none;color:inherit;text-align:center;"|Eye |
||
| + | | class="xl25" style="border-top-style:none;border-left-style:none;text-align:center;"|[[File:Rock.png|20px]] |
||
| + | | class="xl27" style="border-top-style:none;border-left-style:none;text-align:center;"|Chaotic Moss |
||
| + | | class="xl26" style="border-top-style:none;border-left-style:none;color:inherit;text-align:center;" num="0.9"|90.00% |
||
| + | | class="xl26" style="border-top-style:none;border-left-style:none;color:inherit;text-align:center;" num="0.9"|90.00% |
||
| + | | class="xl26" style="border-top-style:none;border-left-style:none;color:inherit;text-align:center;" num="0.7"|70.00% |
||
| + | | class="xl26" style="border-top-style:none;border-left-style:none;text-align:center;"| |
||
| + | |- height="17" style="height:12.75pt" |
||
| + | | class="xl25" height="17" style="height:12.75pt;border-top-style:none;border-left-style:none;text-align:center;"|[[File:Beaker.png|20px]] |
||
| + | | class="xl27" style="border-top-style:none;border-left-style:none;text-align:center;"|Chaotic Eye |
||
| + | | class="xl26" style="border-top-style:none;border-left-style:none;text-align:center;" num="0.1"|10.00% |
||
| + | | class="xl26" style="border-top-style:none;border-left-style:none;text-align:center;" num="0.1"|10.00% |
||
| + | | class="xl26" style="border-top-style:none;border-left-style:none;text-align:center;"| |
||
| + | | class="xl26" style="border-top-style:none;border-left-style:none;text-align:center;"| |
||
| + | |- height="17" style="height:12.75pt" |
||
| + | | class="xl25" height="17" style="height:12.75pt;border-top-style:none;border-left-style:none;text-align:center;"|[[File:Rock.png|20px]] |
||
| + | | class="xl27" style="border-top-style:none;border-left-style:none;text-align:center;"|Chaotic Lichen |
||
| + | | class="xl26" style="border-top-style:none;border-left-style:none;text-align:center;"| |
||
| + | | class="xl26" style="border-top-style:none;border-left-style:none;text-align:center;"| |
||
| + | | class="xl26" style="border-top-style:none;border-left-style:none;text-align:center;" num="0.2"|20.00% |
||
| + | | class="xl26" style="border-top-style:none;border-left-style:none;color:inherit;text-align:center;" num="0.75"|75.00% |
||
| + | |- height="17" style="height:12.75pt" |
||
| + | | class="xl25" height="17" style="height:12.75pt;border-top-style:none;border-left-style:none;text-align:center;"|[[File:Beaker.png|20px]] |
||
| + | | class="xl27" style="border-top-style:none;border-left-style:none;text-align:center;"|Chaotic Oculus |
||
| + | | class="xl26" style="border-top-style:none;border-left-style:none;text-align:center;"| |
||
| + | | class="xl26" style="border-top-style:none;border-left-style:none;text-align:center;"| |
||
| + | | class="xl26" style="border-top-style:none;border-left-style:none;text-align:center;" num="0.1"|10.00% |
||
| + | | class="xl26" style="border-top-style:none;border-left-style:none;text-align:center;" num="0.15"|15.00% |
||
| + | |- height="17" style="height:12.75pt" |
||
| + | | class="xl25" height="17" style="height:12.75pt;border-top-style:none;border-left-style:none;text-align:center;"|[[File:Beaker.png|20px]] |
||
| + | | class="xl27" style="border-top-style:none;border-left-style:none;text-align:center;"|Abyssal Crystal |
||
| + | | class="xl26" style="border-top-style:none;border-left-style:none;text-align:center;"| |
||
| + | | class="xl26" style="border-top-style:none;border-left-style:none;text-align:center;"| |
||
| + | | class="xl26" style="border-top-style:none;border-left-style:none;text-align:center;"| |
||
| + | | class="xl26" style="border-top-style:none;border-left-style:none;text-align:center;" num="0.1"|10.00% |
||
| + | |- height="17" style="height:12.75pt" |
||
| + | | class="xl27" height="119" rowspan="7" style="height:89.25pt;border-top-style:none;color:inherit;text-align:center;"|Horn |
||
| + | | class="xl25" style="border-top-style:none;border-left-style:none;text-align:center;"|[[File:Rock.png|20px]] |
||
| + | | class="xl27" style="border-top-style:none;border-left-style:none;text-align:center;"|Chaotic Horn |
||
| + | | class="xl26" style="border-top-style:none;border-left-style:none;color:inherit;text-align:center;" num="0.9"|90.00% |
||
| + | | class="xl26" style="border-top-style:none;border-left-style:none;color:inherit;text-align:center;" num="0.9"|90.00% |
||
| + | | class="xl26" style="border-top-style:none;border-left-style:none;text-align:center;"| |
||
| + | | class="xl26" style="border-top-style:none;border-left-style:none;text-align:center;"| |
||
| + | |- height="17" style="height:12.75pt" |
||
| + | | class="xl25" height="17" style="height:12.75pt;border-top-style:none;border-left-style:none;text-align:center;"|[[File:Beaker.png|20px]] |
||
| + | | class="xl27" style="border-top-style:none;border-left-style:none;text-align:center;"|Chaotic Toxin |
||
| + | | class="xl26" style="border-top-style:none;border-left-style:none;text-align:center;" num="0.1"|10.00% |
||
| + | | class="xl26" style="border-top-style:none;border-left-style:none;text-align:center;"| |
||
| + | | class="xl26" style="border-top-style:none;border-left-style:none;text-align:center;" num="0.1"|10.00% |
||
| + | | class="xl26" style="border-top-style:none;border-left-style:none;text-align:center;"| |
||
| + | |- height="17" style="height:12.75pt" |
||
| + | | class="xl25" height="17" style="height:12.75pt;border-top-style:none;border-left-style:none;text-align:center;"|[[File:Beaker.png|20px]] |
||
| + | | class="xl27" style="border-top-style:none;border-left-style:none;text-align:center;"|Chaotic Tektite |
||
| + | | class="xl26" style="border-top-style:none;border-left-style:none;text-align:center;"| |
||
| + | | class="xl26" style="border-top-style:none;border-left-style:none;text-align:center;" num="0.1"|10.00% |
||
| + | | class="xl26" style="border-top-style:none;border-left-style:none;text-align:center;"| |
||
| + | | class="xl26" style="border-top-style:none;border-left-style:none;text-align:center;"| |
||
| + | |- height="17" style="height:12.75pt" |
||
| + | | class="xl25" height="17" style="height:12.75pt;border-top-style:none;border-left-style:none;text-align:center;"|[[File:Rock.png|20px]] |
||
| + | | class="xl27" style="border-top-style:none;border-left-style:none;text-align:center;"|Chaotic Spark Horn |
||
| + | | class="xl26" style="border-top-style:none;border-left-style:none;text-align:center;"| |
||
| + | | class="xl26" style="border-top-style:none;border-left-style:none;text-align:center;"| |
||
| + | | class="xl26" style="border-top-style:none;border-left-style:none;color:inherit;text-align:center;" num="0.84"|84.00% |
||
| + | | class="xl26" style="border-top-style:none;border-left-style:none;text-align:center;" num="0.33"|33.00% |
||
| + | |- height="17" style="height:12.75pt" |
||
| + | | class="xl25" height="17" style="height:12.75pt;border-top-style:none;border-left-style:none;text-align:center;"|[[File:Beaker.png|20px]] |
||
| + | | class="xl27" style="border-top-style:none;border-left-style:none;text-align:center;"|Chaotic Onyx |
||
| + | | class="xl26" style="border-top-style:none;border-left-style:none;text-align:center;"| |
||
| + | | class="xl26" style="border-top-style:none;border-left-style:none;text-align:center;"| |
||
| + | | class="xl26" style="border-top-style:none;border-left-style:none;text-align:center;" num="0.06"|6.00% |
||
| + | | class="xl27" style="border-top-style:none;border-left-style:none;text-align:center;"|10.0% |
||
| + | |- height="17" style="height:12.75pt" |
||
| + | | class="xl25" height="17" style="height:12.75pt;border-top-style:none;border-left-style:none;text-align:center;"|[[File:Rock.png|20px]] |
||
| + | | class="xl27" style="border-top-style:none;border-left-style:none;text-align:center;"|Abyssal Horn |
||
| + | | class="xl26" style="border-top-style:none;border-left-style:none;text-align:center;"| |
||
| + | | class="xl26" style="border-top-style:none;border-left-style:none;text-align:center;"| |
||
| + | | class="xl26" style="border-top-style:none;border-left-style:none;text-align:center;"| |
||
| + | | class="xl26" style="border-top-style:none;border-left-style:none;color:inherit;text-align:center;" num="0.5"|50.00% |
||
| + | |- height="17" style="height:12.75pt" |
||
| + | | class="xl25" height="17" style="height:12.75pt;border-top-style:none;border-left-style:none;text-align:center;"|[[File:Beaker.png|20px]] |
||
| + | | class="xl27" style="border-top-style:none;border-left-style:none;text-align:center;"|Abyssal Crystal |
||
| + | | class="xl25" style="border-top-style:none;border-left-style:none;text-align:center;"| |
||
| + | | class="xl25" style="border-top-style:none;border-left-style:none;text-align:center;"| |
||
| + | | class="xl25" style="border-top-style:none;border-left-style:none;text-align:center;"| |
||
| + | | class="xl26" style="border-top-style:none;border-left-style:none;text-align:center;" num="0.07"|7.00% |
||
| + | |- height="17" style="height:12.75pt;color:inherit;margin-right:1px;padding-bottom: 2px;padding-top:2px" |
||
| + | | class="xl27" height="68" rowspan="4" style="height:51pt;border-top-style:none;color:inherit;text-align:center;"|Feet |
||
| + | | class="xl25" style="border-top-style:none;border-left-style:none;text-align:center;"|[[File:Skin.png|20px]] |
||
| + | | class="xl27" style="border-top-style:none;border-left-style:none;text-align:center;"|Chaotic Vicuna |
||
| + | | class="xl26" style="border-top-style:none;border-left-style:none;color:inherit;text-align:center;" num="0.5"|50.00% |
||
| + | | class="xl26" style="border-top-style:none;border-left-style:none;color:inherit;text-align:center;" num="0.5"|50.00% |
||
| + | | class="xl26" style="border-top-style:none;border-left-style:none;color:inherit;text-align:center;" num="0.33300000000000002"|33.30% |
||
| + | | class="xl26" style="border-top-style:none;border-left-style:none;text-align:center;" num="0.3"|30.00% |
||
| + | |- height="17" style="height:12.75pt" |
||
| + | | class="xl25" height="17" style="height:12.75pt;border-top-style:none;border-left-style:none;text-align:center;"|[[File:Rock.png|20px]] |
||
| + | | class="xl27" style="border-top-style:none;border-left-style:none;text-align:center;"|Chaotic Claw |
||
| + | | class="xl26" style="border-top-style:none;border-left-style:none;text-align:center;" num="0.5"|50.00% |
||
| + | | class="xl26" style="border-top-style:none;border-left-style:none;text-align:center;" num="0.5"|50.00% |
||
| + | | class="xl26" style="border-top-style:none;border-left-style:none;text-align:center;" num="0.33300000000000002"|33.30% |
||
| + | | class="xl25" style="border-top-style:none;border-left-style:none;text-align:center;"| |
||
| + | |- height="17" style="height:12.75pt" |
||
| + | | class="xl25" height="17" style="height:12.75pt;border-top-style:none;border-left-style:none;text-align:center;"|[[File:Rock.png|20px]] |
||
| + | | class="xl27" style="border-top-style:none;border-left-style:none;text-align:center;"|Chaotic Spark Claw |
||
| + | | class="xl25" style="border-top-style:none;border-left-style:none;text-align:center;"| |
||
| + | | class="xl25" style="border-top-style:none;border-left-style:none;text-align:center;"| |
||
| + | | class="xl26" style="border-top-style:none;border-left-style:none;text-align:center;" num="0.33300000000000002"|33.30% |
||
| + | | class="xl26" style="border-top-style:none;border-left-style:none;text-align:center;" num="0.3"|30.00% |
||
| + | |- height="17" style="height:12.75pt" |
||
| + | | class="xl25" height="17" style="height:12.75pt;border-top-style:none;border-left-style:none;text-align:center;"|[[File:Rock.png|20px]] |
||
| + | | class="xl27" style="border-top-style:none;border-left-style:none;text-align:center;"|Abyssal Claw |
||
| + | | class="xl25" style="border-top-style:none;border-left-style:none;text-align:center;"| |
||
| + | | class="xl25" style="border-top-style:none;border-left-style:none;text-align:center;"| |
||
| + | | class="xl25" style="border-top-style:none;border-left-style:none;text-align:center;"| |
||
| + | | class="xl26" style="border-top-style:none;border-left-style:none;color:inherit;text-align:center;" num="0.4"|40.00% |
||
| + | |} |
||
| + | </tabber> |
||
{{HeadingB|Screenshots}} |
{{HeadingB|Screenshots}} |
||
| Line 460: | Line 698: | ||
{{HeadingB| Gameplay Videos}} |
{{HeadingB| Gameplay Videos}} |
||
None. |
None. |
||
| − | [[Category:Aragami]] |
||
Revision as of 09:05, 1 March 2013
|
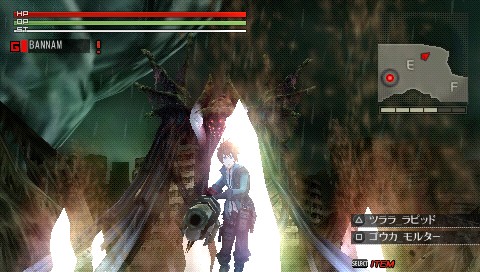
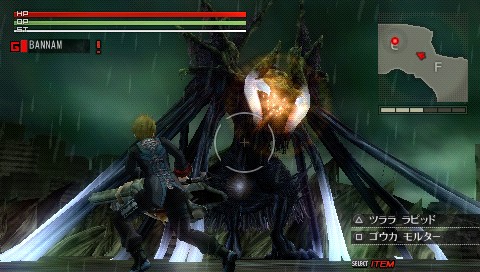
A uniquely-shaped huge Aragami with innumerable tentacles and eyes. Also known as the Conqueror of the Plains, its body is the size of a mountain. As well as its tentacle attacks, it emits a large-caliber beam. Origins unknown. Avoid medium-to-long range combat. Stay out of its reach and repulse it with gunfire, then strike with one's sword to be safe. When activated by rage, its legs become vulnerable. Blade Attacking Tips:
Gun Attacking Tips:
Status Resistances:
Enraged Effects:
Unbounding Tips:
Other Useful Tips:
| ||||||||||||||||||||||||||||||||||||||||||

| Part | Gun | Blade | Elemental | ||||||
|---|---|---|---|---|---|---|---|---|---|
| Crush | Pierce | Sunder | Crush | Pierce | Blaze | Freeze | Spark | Divine | |
| Compound Eyes (Unbound) | 90 | 20 | 80 | 80 | 80 | 40 | 40 | 90 | 40 |
| Horn (Unbound) | 90 | 90 | 90 | 15 | 90 | 60 | 60 | 90 | 60 |
| Wing Shoulders | 90 | 90 | 90 | 90 | 90 | 60 | 60 | 90 | 60 |
| Tentacles | 70 | 90 | 10 | 35 | 15 | 70 | 70 | 90 | 60 |
| Body | 90 | 90 | 90 | 90 | 90 | 70 | 70 | 90 | 70 |
| Both Legs (Unbound) | 40 | 90 | 70 | 10 | 40 | 90 | 90 | 90 | 70 |
| Part | Gun | Blade | Elemental | ||||||
|---|---|---|---|---|---|---|---|---|---|
| Crush | Pierce | Sunder | Crush | Pierce | Blaze | Freeze | Spark | Divine | |
| Compound Eyes (Unbound) | 90 | (10) | (15) | 80 | (15) | 40 | 40 | 90 | 40 |
| Horn (Unbound) | 90 | (30) | 90 | 15 | 90 | (50) | (50) | 90 | (30) |
| Wing Shoulders | 90 | 90 | 90 | 90 | 90 | 60 | 60 | 90 | 60 |
| Tentacles | 70 | 90 | 10 | 35 | 15 | 70 | 70 | 90 | 60 |
| Body | 90 | 90 | 90 | 90 | 90 | 70 | 70 | 90 | 70 |
| Both Legs (Unbound) | (20) | 90 | (80) | 10 | (20) | 90 | 90 | 90 | 70 |
| Part | Gun | Blade | Elemental | ||||||
|---|---|---|---|---|---|---|---|---|---|
| Crush | Pierce | Sunder | Crush | Pierce | Blaze | Freeze | Spark | Divine | |
| Compound Eyes (Unbound) | 90 | 20 | 80 | 80 | 80 | 40 | 40 | 90 | 40 |
| Horn (Unbound) | 90 | 90 | 90 | 15 | 90 | 60 | 60 | 90 | 60 |
| Wing Shoulders | 90 | 90 | 90 | 90 | 90 | 60 | 60 | 90 | 60 |
| Tentacles | 70 | 90 | 10 | 35 | 15 | 70 | 70 | 90 | 60 |
| Body | 90 | 90 | 90 | 90 | 90 | 70 | 70 | 90 | 70 |
| Both Legs (Unbound) | [30] | [25] | [15] | 10 | [10] | 90 | 90 | 90 | 70 |
| Part | Gun | Blade | Elemental | ||||||
|---|---|---|---|---|---|---|---|---|---|
| Crush | Pierce | Sunder | Crush | Pierce | Blaze | Freeze | Spark | Divine | |
| Compound Eyes (Unbound) | 90 | (10) | (15) | 80 | (15) | 40 | 40 | 90 | 40 |
| Horn (Unbound) | 90 | (30) | 90 | 15 | 90 | (50) | (50) | 90 | (30) |
| Wing Shoulders | 90 | 90 | 90 | 90 | 90 | 60 | 60 | 90 | 60 |
| Tentacles | 70 | 90 | 10 | 35 | 15 | 70 | 70 | 90 | 60 |
| Body | 90 | 90 | 90 | 90 | 90 | 70 | 70 | 90 | 70 |
| Both Legs (Unbound) | (20) | [25] | [15] | 10 | [10] | 90 | 90 | 90 | 70 |
Notes:
- [Enraged] status will override Normal and (Unbound) attributes for its duration except for the both legs part's gun crush defense attribute. In this case, the (Unbound) attribute will override the [Enraged] attribute.
| Pic | Material Name | Devour Rates per Difficulty | |||
| 5 | 6 | 7 | 10 | ||
| Chaotic Armor (1) | 21.00% | 20.00% | |||
| Chaotic Moss | 20.00% | 20.00% | |||
| Chaotic Claw | 19.00% | 22.00% | 9.00% | ||
| Chaotic Horn | 16.00% | 16.00% | |||
| Chaotic Gun | 15.00% | 15.00% | 15.00% | ||
| Chaotic Tektite | 9.00% | 7.00% | |||
| Chaotic Femur | 30.00% | ||||
| Chaotic Armor (2) | 28.00% | 21.80% | |||
| Chaotic Spark Gun | 15.00% | ||||
| Chaotic Onyx | 3.00% | ||||
| Abyssal Bone | 36.40% | ||||
| Abyssal Claw | 22.70% | ||||
| Abyssal Gun | 13.60% | ||||
| Abyssal Crystal | 5.50% | ||||
| Part | Pic | Material Name | Bonus Rates per Difficulty | |||
| 5 | 6 | 7 | 10 | |||
| Eye | Chaotic Moss | 90.00% | 90.00% | 70.00% | ||
| Chaotic Eye | 10.00% | 10.00% | ||||
| Chaotic Lichen | 20.00% | 75.00% | ||||
| Chaotic Oculus | 10.00% | 15.00% | ||||
| Abyssal Crystal | 10.00% | |||||
| Horn | Chaotic Horn | 90.00% | 90.00% | |||
| Chaotic Toxin | 10.00% | 10.00% | ||||
| Chaotic Tektite | 10.00% | |||||
| Chaotic Spark Horn | 84.00% | 33.00% | ||||
| Chaotic Onyx | 6.00% | 10.0% | ||||
| Abyssal Horn | 50.00% | |||||
| Abyssal Crystal | 7.00% | |||||
| Feet | Chaotic Vicuna | 50.00% | 50.00% | 33.30% | 30.00% | |
| Chaotic Claw | 50.00% | 50.00% | 33.30% | |||
| Chaotic Spark Claw | 33.30% | 30.00% | ||||
| Abyssal Claw | 40.00% | |||||

|
|
|
|
None.