(minor fix... eating dinner so i'll carry on the bullet guide in a mo) |
(Blog post created or updated.) |
||
| Line 26: | Line 26: | ||
Before doing anything... Hit "Save" and save your game. |
Before doing anything... Hit "Save" and save your game. |
||
| − | |||
| − | |||
Now head over to Loadout. here you can change your equipment. The game provides you with 1 of each of the different types of weapons & shields. We'll cover them later-on so choose which ones you wanna use scroll down and enter the Bullets section. There you will find aa handfull of premade bullets, however you'll soon want to start making you're own bullets. Navigate to an empty Bullet slot and press Triangle to bring up a menu and create a new bullet... Select Blast Bullet. |
Now head over to Loadout. here you can change your equipment. The game provides you with 1 of each of the different types of weapons & shields. We'll cover them later-on so choose which ones you wanna use scroll down and enter the Bullets section. There you will find aa handfull of premade bullets, however you'll soon want to start making you're own bullets. Navigate to an empty Bullet slot and press Triangle to bring up a menu and create a new bullet... Select Blast Bullet. |
||
| Line 41: | Line 39: | ||
| style="background-color: rgba(0, 0, 0, 1);color:#ffffff;" |On Button press |
| style="background-color: rgba(0, 0, 0, 1);color:#ffffff;" |On Button press |
||
| style="background-color: rgba(64, 64, 64, 1);color:#ffffff;" |↔ 00º ↕ +60º O 00º |
| style="background-color: rgba(64, 64, 64, 1);color:#ffffff;" |↔ 00º ↕ +60º O 00º |
||
| + | |colspan="2"|Blood Art: None |
||
|- |
|- |
||
| style="background-color: rgba(153, 77, 0, 1);color:#ffffff;" |B |
| style="background-color: rgba(153, 77, 0, 1);color:#ffffff;" |B |
||
| style="background-color: rgba(0, 0, 0, 1);color:#ffffff;" |SS |
| style="background-color: rgba(0, 0, 0, 1);color:#ffffff;" |SS |
||
| style="background-color: rgba(191, 191, 191, 1);color:#000000;" |Deco Laser:Straight/Point Blank |
| style="background-color: rgba(191, 191, 191, 1);color:#000000;" |Deco Laser:Straight/Point Blank |
||
| + | |colspan="2"|OP cost 1 |
||
|} |
|} |
||
| Line 58: | Line 58: | ||
| style="background-color: rgba(0, 0, 0, 1);color:#ffffff;" |On Button press |
| style="background-color: rgba(0, 0, 0, 1);color:#ffffff;" |On Button press |
||
| style="background-color: rgba(64, 64, 64, 1);color:#ffffff;" |↔ 00º ↕ +60º O 00º |
| style="background-color: rgba(64, 64, 64, 1);color:#ffffff;" |↔ 00º ↕ +60º O 00º |
||
| + | |colspan="2"|Blood Art: None |
||
|- |
|- |
||
| style="background-color: rgba(153, 77, 0, 1);color:#ffffff;" |B |
| style="background-color: rgba(153, 77, 0, 1);color:#ffffff;" |B |
||
| style="background-color: rgba(0, 0, 0, 1);color:#ffffff;" |SS |
| style="background-color: rgba(0, 0, 0, 1);color:#ffffff;" |SS |
||
| style="background-color: rgba(191, 191, 191, 1);color:#000000;" |Deco Laser:Straight/Point Blank |
| style="background-color: rgba(191, 191, 191, 1);color:#000000;" |Deco Laser:Straight/Point Blank |
||
| + | |colspan="2"|OP cost 1 |
||
|- |
|- |
||
| style="background-color: rgba(51, 51, 0, 1);color:#ffffff; rowspan="2" | 2 |
| style="background-color: rgba(51, 51, 0, 1);color:#ffffff; rowspan="2" | 2 |
||
| + | | style="background-color: rgba(51, 51, 0, 1);color:#ffffff; rowspan="2" |╚ |
||
| style="background-color: rgba(191, 191, 191, 1);color:#000000;" colspan="2" |When 1 Fades |
| style="background-color: rgba(191, 191, 191, 1);color:#000000;" colspan="2" |When 1 Fades |
||
| − | | style="background-color: rgba(64, 64, 64, 1);color:#ffffff; |
+ | | style="background-color: rgba(64, 64, 64, 1);color:#ffffff;" |↔ 00º ↕ -50º O 00º |
| + | |colspan="2"|Blood Art: None |
||
|- |
|- |
||
| style="background-color: rgba(153, 77, 0, 1);color:#ffffff;" |B |
| style="background-color: rgba(153, 77, 0, 1);color:#ffffff;" |B |
||
| style="background-color: rgba(0, 0, 0, 1);color:#ffffff;" |M |
| style="background-color: rgba(0, 0, 0, 1);color:#ffffff;" |M |
||
| − | | style="background-color: rgba(191, 191, 191, 1);color:#000000;" |Control: Aim at Foe/Normal Time |
+ | | style="background-color: rgba(191, 191, 191, 1);color:#000000;" colspan="2"|Control: Aim at Foe/Normal Time |
| + | |OP cost 1 |
||
|} |
|} |
||
| + | Now when you test your bullet you won't notice any change from the last test. That is because you need to add a new module that will do something. This time add "B - SS: Shot: Straight/Long." and push it right untill it says "With 2"... then change "With 2" to "0.2 sec. after 2." it should now look like this: |
||
| + | {| style="background:rgba(0, 0, 0, 0.6);color:#ffff99; font-size:89%; width:100%; border-radius:0ex; border:0px solid transparent;" |
||
| − | |||
| + | | style="background-color: rgba(51, 51, 0, 1);color:#ffffff; rowspan="2" | 1 |
||
| − | |||
| + | | style="background-color: rgba(51, 51, 0, 1);color:#ffffff; rowspan="2" |╚ |
||
| + | | style="background-color: rgba(51, 51, 0, 1);color:#ffffff;" |Lock |
||
| + | | style="background-color: rgba(0, 0, 0, 1);color:#ffffff;" |On Button press |
||
| + | | style="background-color: rgba(64, 64, 64, 1);color:#ffffff;" colspan="3 |↔ 00º ↕ +60º O 00º |
||
| + | |Blood Art: None |
||
| + | |- |
||
| + | | style="background-color: rgba(153, 77, 0, 1);color:#ffffff;" |B |
||
| + | | style="background-color: rgba(0, 0, 0, 1);color:#ffffff;" |SS |
||
| + | | style="background-color: rgba(191, 191, 191, 1);color:#000000;" colspan="3 |Deco Laser:Straight/Point Blank |
||
| + | |OP cost |
||
| + | |- |
||
| + | | style="background-color: rgba(51, 51, 0, 1);color:#ffffff; rowspan="2" colspan="2"| 2 |
||
| + | | style="background-color: rgba(51, 51, 0, 1);color:#ffffff; rowspan="2" |╚ |
||
| + | | style="background-color: rgba(191, 191, 191, 1);color:#000000;" colspan="2" |When 1 Fades |
||
| + | | style="background-color: rgba(64, 64, 64, 1);color:#ffffff;" colspan="2" |↔ 00º ↕ -50º O 00º |
||
| + | |colspan="2"|Blood Art: None |
||
| + | |- |
||
| + | | style="background-color: rgba(153, 77, 0, 1);color:#ffffff;" |B |
||
| + | | style="background-color: rgba(0, 0, 0, 1);color:#ffffff;" |M |
||
| + | | style="background-color: rgba(191, 191, 191, 1);color:#000000;" colspan="2" |Control: Aim at Foe/Normal Time |
||
| + | |OP Cost |
||
| + | |- |
||
| + | | style="background-color: rgba(51, 51, 0, 1);color:#ffffff; rowspan="2" colspan="3" | 3 |
||
| + | | style="background-color: rgba(51, 51, 0, 1);color:#ffffff; rowspan="2" |╚ |
||
| + | | style="background-color: rgba(191, 191, 191, 1);color:#000000;" |0.2 sec. after 2 |
||
| + | | style="background-color: rgba(64, 64, 64, 1);color:#ffffff;" colspan="4" |↔ 00º ↕ -00º O 00º |
||
| + | |Blood Art: |
||
| + | |None |
||
| + | |- |
||
| + | | style="background-color: rgba(153, 77, 0, 1);color:#ffffff;" |B |
||
| + | | style="background-color: rgba(0, 0, 0, 1);color:#ffffff;" |S |
||
| + | | style="background-color: rgba(191, 191, 191, 1);color:#000000;" |Shot: |
||
| + | | style="background-color: rgba(191, 191, 191, 1);color:#000000;" colspan="2"|Straight/Long |
||
| + | |OP Cost: |
||
| + | |00 |
||
| + | |} |
||
Revision as of 20:05, 18 April 2020
Note this guide is in development.
| Note: This Guide is based on how i play GE2RB and assumes you are playing the English Version using a PS Vita. |
Getting Started - Character Creation
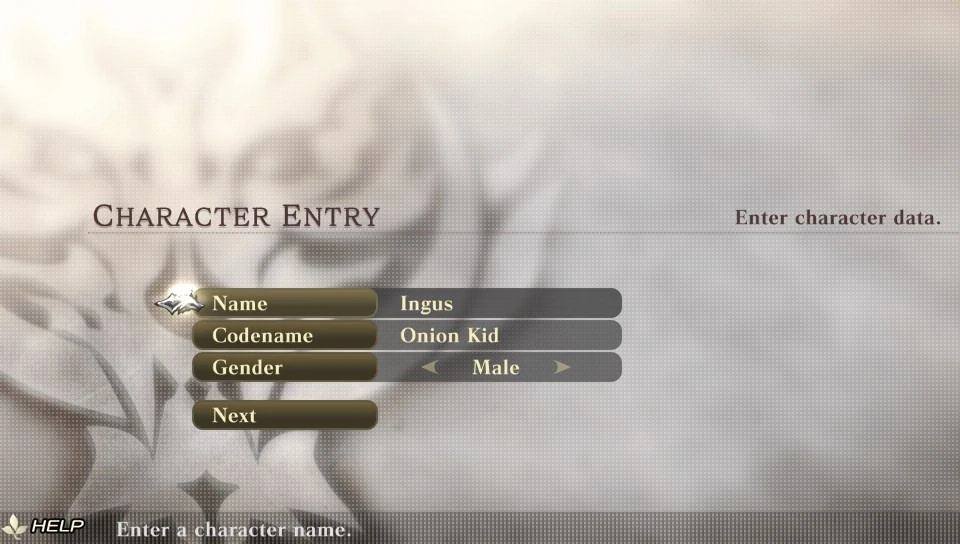
Hit "Start" & select New Game. You will be taken to a screen that lets you Input a name and a Code name, while being able to select your gender.
| Note: Think carefully about your Code Name as you won't be able to change it when re-birthing (Restarting the story/changing avatar face via "import save data"). |
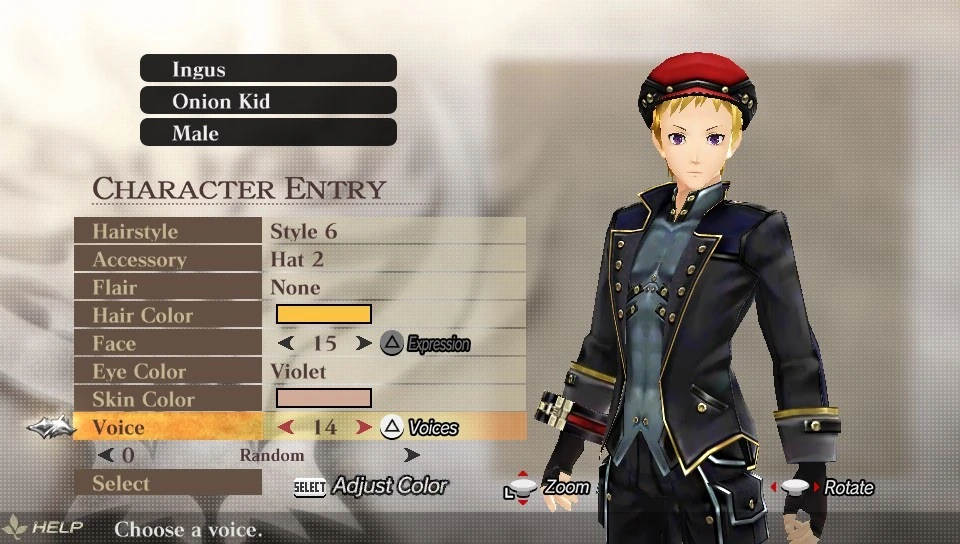
On the next screen you will create your avatar, then afterwards you pick your save slot... simple, right?
| For this Guide i'm gonna go with: | |
 |
 |
When you start the game - after a intro cinematic, you will wake up in the first Hub area Friar Lobby, with no memory of your past life as a God Eater... I Jest, but its worth noting that progress from God Eater Burst or God Eater Resurrection dosen't carry over into God Eater 2 Rage Burst.
Getting Started - Equipment & Bullets
Before you head over to Fran or to the Elevator. Open up option by pressing start and change your control setting to match your style. Personally i prefer Type-B controls. Next head over to the "Terminal" found to the right of Fran and press X (cross) to open it up.
Before doing anything... Hit "Save" and save your game. Now head over to Loadout. here you can change your equipment. The game provides you with 1 of each of the different types of weapons & shields. We'll cover them later-on so choose which ones you wanna use scroll down and enter the Bullets section. There you will find aa handfull of premade bullets, however you'll soon want to start making you're own bullets. Navigate to an empty Bullet slot and press Triangle to bring up a menu and create a new bullet... Select Blast Bullet.
At this point you may find you're self lost and completly clueless. So i'm gonna guide you into making a simple Blast Bullet. It wont be the best bullet, but it should give you a glimps at how the bullet editor works. (You can also take alook at the premade bullets to see how their set up).
Firstly we need to select your first module. Press X and you will see a list of Elements and Module sizes. Elements: B = Blaze, F = Freeze, SP = Spark & D = Divine (there are other elements but we wont need them atm). Size: SS = Super Small, S = Small, M = Meduim, L = Large and LL = Extra Large.
Select "B - SS" and navigate to "Deco Laser:Straight/Point Blank." - A "Deco" bullet is a bullet that dosen't do any damage - in other words, its just for show. Once you've placed the bullet, select it again and select the bar that has [↔ 00º ↕ 00º O 00º] on it and change the "↕ 00º - up/down angle" to ↕ +60º by tilting the left stick upwards and comfirming it with X.
| 1 | Lock | On Button press | ↔ 00º ↕ +60º O 00º | Blood Art: None | |
| B | SS | Deco Laser:Straight/Point Blank | OP cost 1 | ||
Now Press Start and Test the bullet with Square, it should show a laser firing upwards. Press O to return to the modules and navigate to "new module." This time you need to select a "Control module" - this module will give your bullet a command. Select "B - M" and navigate to "Control: Aim at Foe/Normal Time" and select it. Next move the module into place so it falls under the first bullet and the words "Lock On button press" changes to "With 1."
"Module 2" will now fire at the same time as "Module 1." We need to change that, so select the Module again and change the command "With 1" to "When 1 fades." This will make module 2 fire after module 1... at the point module 1 faded. Which is good because that what we want, but just remember every new module usually starts where the first module ended, as long as their connected. Change the Up/Down value to ↕ -50º.
Should look something like this:
| 1 | Lock | On Button press | ↔ 00º ↕ +60º O 00º | Blood Art: None | ||
| B | SS | Deco Laser:Straight/Point Blank | OP cost 1 | |||
| 2 | ╚ | When 1 Fades | ↔ 00º ↕ -50º O 00º | Blood Art: None | ||
| B | M | Control: Aim at Foe/Normal Time | OP cost 1 | |||
Now when you test your bullet you won't notice any change from the last test. That is because you need to add a new module that will do something. This time add "B - SS: Shot: Straight/Long." and push it right untill it says "With 2"... then change "With 2" to "0.2 sec. after 2." it should now look like this:
| 1 | ╚ | Lock | On Button press | ↔ 00º ↕ +60º O 00º | Blood Art: None | |||||
| B | SS | Deco Laser:Straight/Point Blank | OP cost | |||||||
| 2 | ╚ | When 1 Fades | ↔ 00º ↕ -50º O 00º | Blood Art: None | ||||||
| B | M | Control: Aim at Foe/Normal Time | OP Cost | |||||||
| 3 | ╚ | 0.2 sec. after 2 | ↔ 00º ↕ -00º O 00º | Blood Art: | None | |||||
| B | S | Shot: | Straight/Long | OP Cost: | 00 | |||||
| This table is under construction and will be updated at a later date. | |||
| Weapon Controls (This Assumes ur using Type B controls) | |||
|---|---|---|---|
| □ = Weak Attack | Δ = Strong Attack | Hold Δ, then release = Devour | R1 + Χ = Gun Action/Quick Gun form |
| Ο = Block | R1 + Ο = Quick Step | R1 + left stick = Sprint | R1 = Switch to Gun form |
| Short blades | |||
| Known for their fast attacks and for moving quickly on the battlefield. If you don't like the sluggish movement of Buster type weapons, this is the weapon for you. Note i've gave these combos names based on what i call them, if you know the correct combo names let me know. | |||
| Basic: | |||
| Slash Attack: | □ | Slash Attack combo: | □ □ □ □ |
| Piercing Attack | Δ | Piercing Attack Combo | Δ Δ Δ Δ |
| Devour Attack | At the end of a Combo, hold R1 + Δ to Devour | ||
| Advance Controls: (Type-B) | |||
| Upper Cut | R1 + □ | Upper Cut Arial combo | R1 + □ then □ □ □ |
| Upper Cut Dive | Press Δ while in the Air or at the end of a airial combo. | ||
| Quick Step Combo Reset | After an Attack or combo press Ο + Left Stick (any direction) to do a quick step and continue your attack combo. | ||
ΔΟΧ□